
Table of Contents
EJuice Brands and Flavors in 4 Simple Steps
The DIY (Do It Yourself) is an alternative mode of making one’s own eliquid. Some people refer to this method in order to stop smoking, given its high risk of causing lung and other types of cancer.
Producing your own ejuice allows you to dose the aromas, as well as its base and nicotine rate, to create a unique e-liquid totally suited to your way of vaporizing. This is also an opportunity to test and invent new flavors. The DIY eliquid is not only economical but also simpler than you may think.
What do I need to make my eliquid?
It takes little to make ejuice, here we will list the indispensable tools and ingredients you need for the production:
- The Base: it represents the major element of the DIY e-liquid, up to 90% of the mixture. It is a “neutral” liquid composed of Propylene Glycol and / or Vegetable Glycerin.
- Nicotine: the nicotine in the form of a booster in 10ml bottle if you want a nicotine base.
- Flavors: Natural or artificial flavors, it exists for all tastes: fruits, menthols and others.
- Additives: they are considered as “taste enhancers”, but optional in the preparation.
How to make my own eliquid?
The production is divided into two main parts: the creation of the liquid and, above all, its maturation.

The Creation of the Ejuice (without nicotine)
1. First you will need glasses and gloves and place all your equipments on a clean and empty work surface.
2. Using a syringe or graduated pipette, fill a blank bottle with your base, nicotine or not, ready to use. Example: To make 10ml of e-liquid: put 8ml of base, the remaining +/- 2ml will be the aromas and additives
3. Add basic additives such as alcohol and / or pure water (this is optional and depends on your taste)
4. Add a few drops of flavor (s) (concentrated or not). Always start with small quantities.
5. Optional: add one or more additives (freshness, taste softener, etc …)
6. Close the bottle and shake it vigorously for 30 to 60 seconds and let stand for a few minutes. Repeat the operation several times.
7. Store your bottle away from light and accessible to you alone.
8. Wash your hands, clean your equipment and your work place.
9. Take note, save or adjust your recipe accordingly.
Maturation
Maturation is a crucial step; it is the time necessary for your preparation to reach its highest degree of aromatic development. Depending on the type of flavor, the maturation time will be longer or shorter:
- Mono-aroma fruit flavor: 0 to 5 days.
• Complex fruity aromas (several flavors): from 3 to 7 days if composed only of fruits.
• Mint aromas, spices, anise, coffees, vanilla: 1 to 2 weeks.
• Gourmet aromas: 2 to 3 weeks.
• Classic flavor: minimum 2 weeks.
What types of Maturation I Can Use?
There are two main maturation methods: the steeping and breathing.
1) The steeping – After shaking your bottle vigorously at the end of your preparation and placing it in a place away from light the steeping process is on. You can accelerate it by removing the safety cap, leaving the tip on the bottle, pressing it to chase the air, then replace the cap and shake the bottle at least once a day for about one minute. Steeping is essential for gourmet aromas, classic, diluted with alcohol or if your eliquid has a bad odor or a bad taste.
2) Breathing – Not to be confused with steeping, it consists simply in: removing the safety cap as well as the spout, store the bottle and wait an hour maximum. This will allow evaporation of the alcohols contained in the base. It will be necessary if you find your liquid too strong or too alcoholic or if you want to accelerate the process of maturation of a gourmet or classic liquid only.
As you progress through the DIY, you will discover the associations that work, it is practical with new flavors to do tests, a few drops in 2 / 3mL base, to get a taste of the flavor, its strength, and its notes. 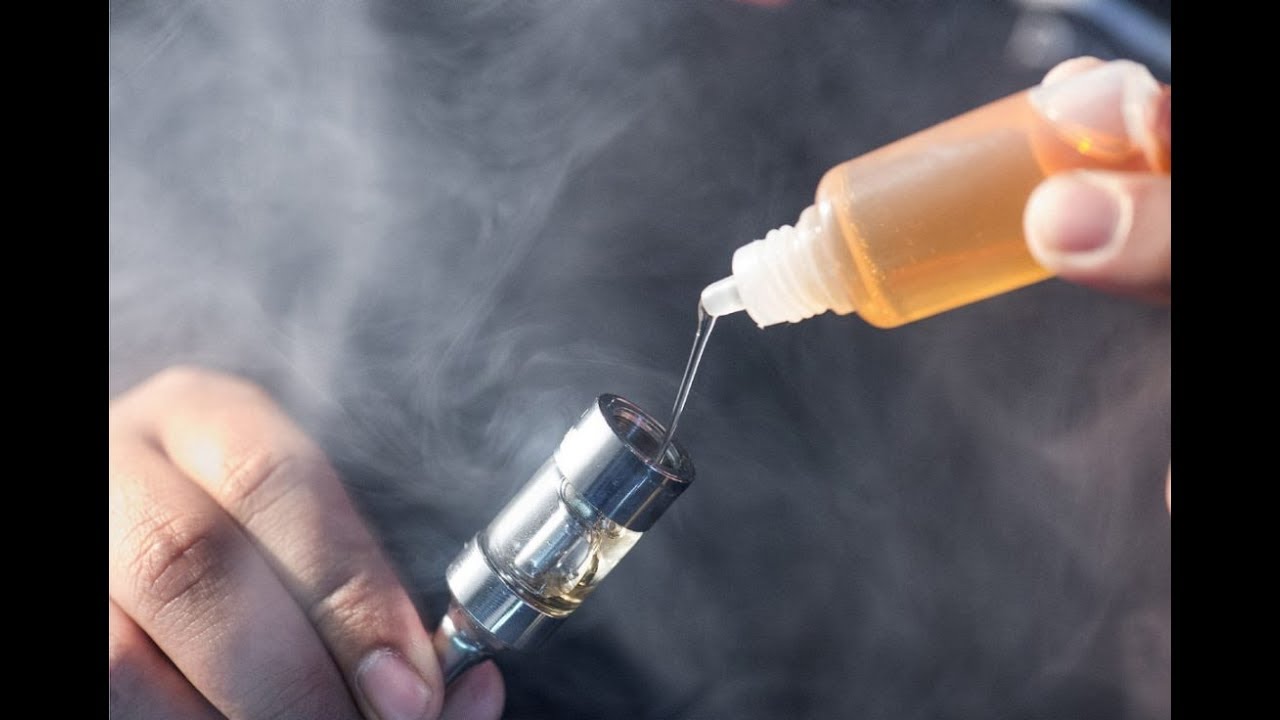 It can even be useful if a flavor is very concentrated, in order to dilute it before a new project. Also take note of your progress and mistakes during the preparation.
But not everyone can or wants to do their own liquid. The ideal thing to do is to buy from a reputable seller or producer that provides high quality products. Certain sites, such as ejuicevapor.com, offer free information and latest news on the Best EJuice Brands and Flavors on the market. You can use their tools to help you make your choice.